

If you have an ebook, a template, or a Notion doc sitting in a folder, you already have a product. What you do not have is a way to take money for it and hand it over without doing the handover yourself, one buyer at a time.
I have been using Systeme.io for over a year now and it is one of my longest standing subscriptions. This is the exact build I run when I want to sell something new.
The whole thing takes about an hour, and most of that hour goes into making the checkout look right rather than wiring up payments. The wiring is the fast part.
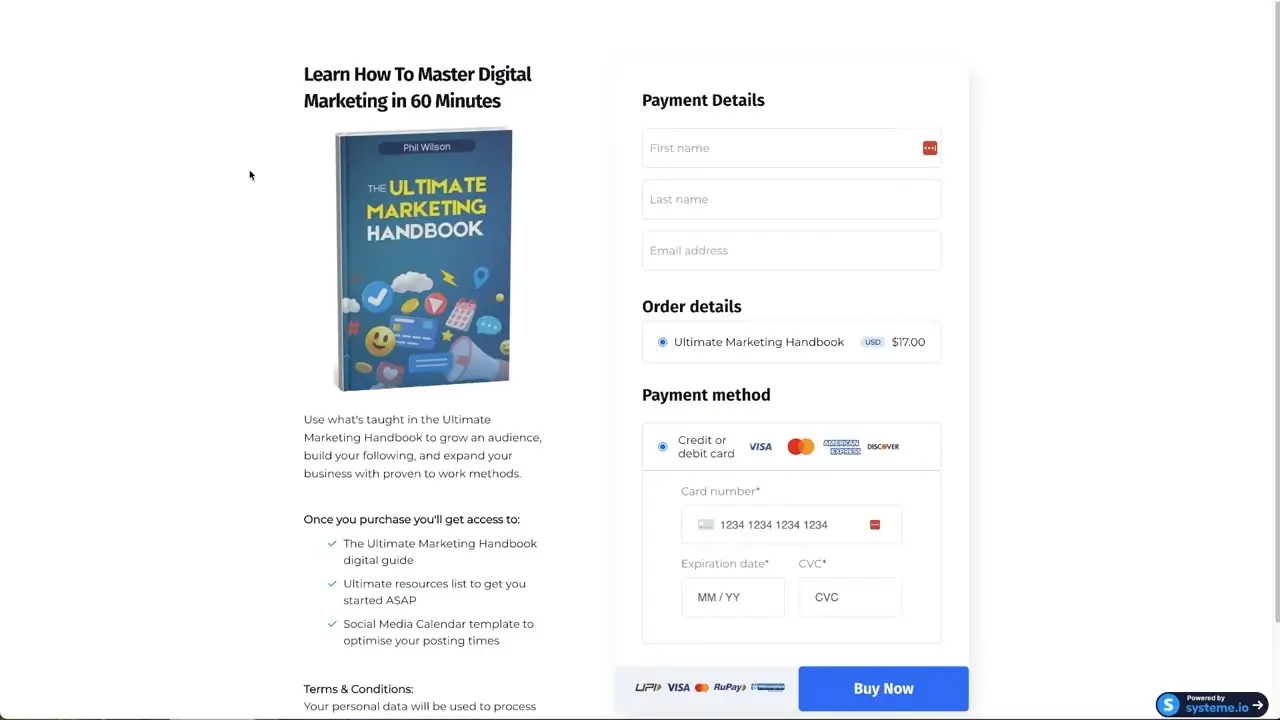
Here is what you finish with:
- a sales page
- a working checkout
- a thank-you page, and
- an automated email that arrives with your file attached.
If you do not have an account yet, set up a free Systeme.io account before you start. The free plan covers everything in this article.
Before you start: the three things Systeme.io needs from you
You can sell digital products on the free plan. Systeme.io just needs three things first.
- A custom domain. Email sending runs through a verified domain, and the delivery email is the point of this build. The free plan allows one custom domain.
- A payment gateway. Stripe or PayPal, connected in your account settings. Neither adds a fee through Systeme.io.
- The file you are selling. A PDF, an ebook, a template pack, an audio file. Every plan includes unlimited file storage, including free.
No coding appears anywhere in this tutorial.
One limit to know up front: the free plan includes one automation rule. This build uses exactly one, so it fits. If you already have an automation running, either upgrade to Startup at $17 per month or reuse the rule you have.
Are you selling one product or a handful? That answer decides whether you name the funnel after the product or after your brand. Nothing else changes.
Those three pieces have to exist before the platform will let you finish the funnel, so start with the domain.
Step 1: Do you need a custom domain to sell on Systeme.io?
Yes, if you want the delivery email to go out from your own address.
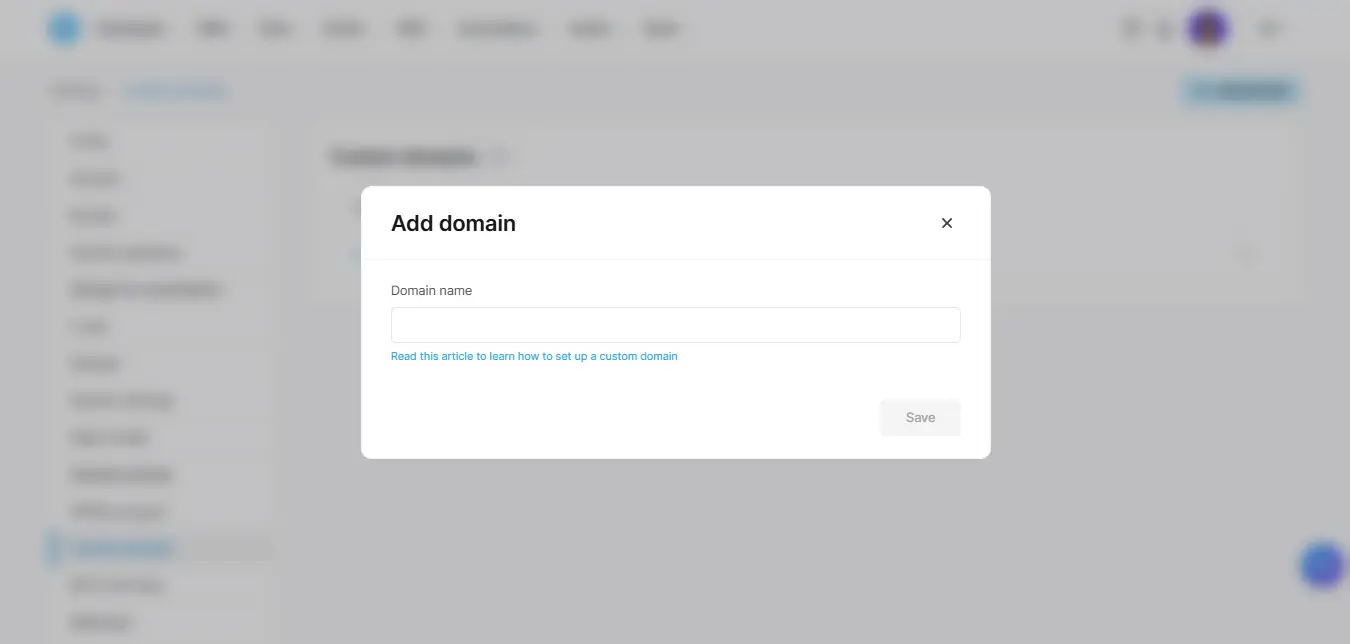
- Click your profile image in the top right, open Settings, and find the domain field.
- Once the domain is connected and verified, Systeme.io can send buyer emails from your address instead of a generic one. That single detail decides whether your buyer sees a message from your brand or from a stranger.
- The DNS part takes about 10 minutes and I am not covering it here. If you get stuck, the Systeme.io help docs walk through the two records you need to add.
“Can I just use the free Systeme.io subdomain instead?” You can, and you give up the delivery email. For a free lead magnet that works fine. For a $17 product, connect the domain.
With the domain live, the next step is building the funnel itself.
Step 2: How do you create a sales funnel in Systeme.io?
Path: Sites, then Sales funnels, then Create in the top right.
Name the funnel after the product you are selling. I use a template I pulled from Canva and sell it as an eBook called the Ultimate Marketing Handbook.
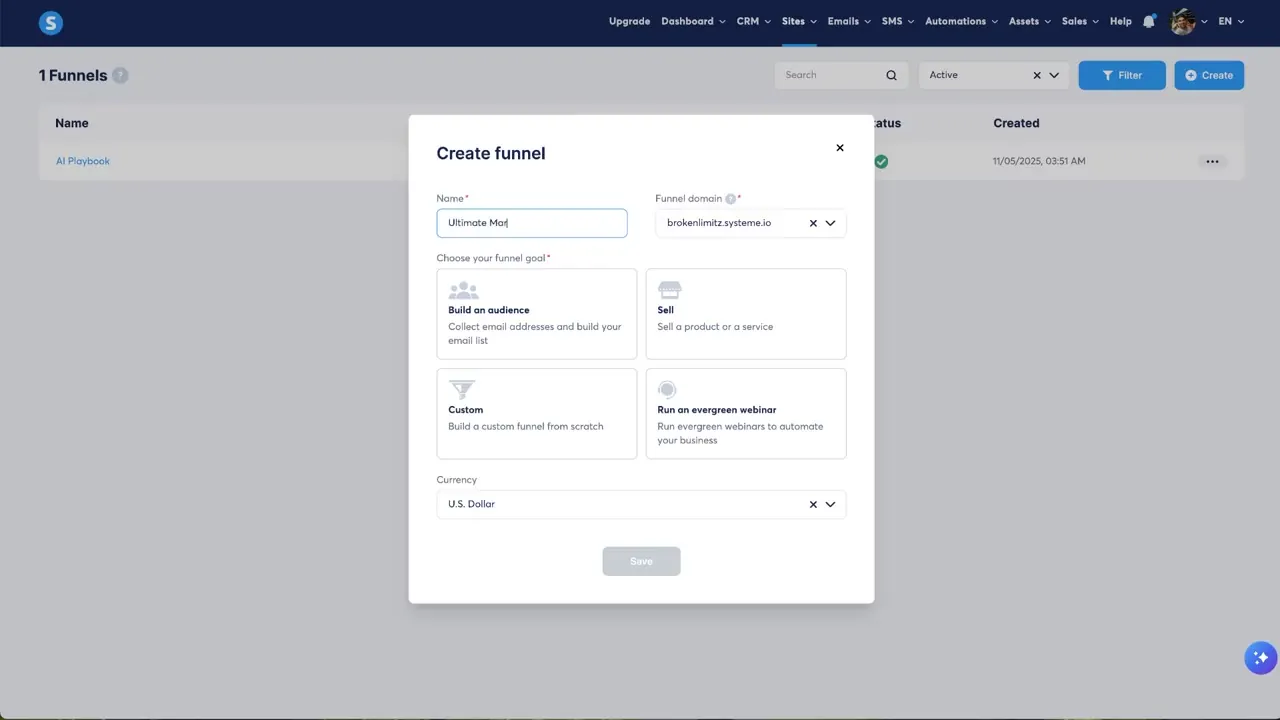
Fill in four fields: pick your connected domain, set the goal to sell a product or service, choose your currency, and save.
Now you have a funnel with the two pages you need. Open it and click the template button at the bottom, then change the result count to show all 30 templates. Preview two or three, pick one, and click Select.
Starting from a blank canvas is possible and it is also harder than it needs to be. Adapt a template instead.
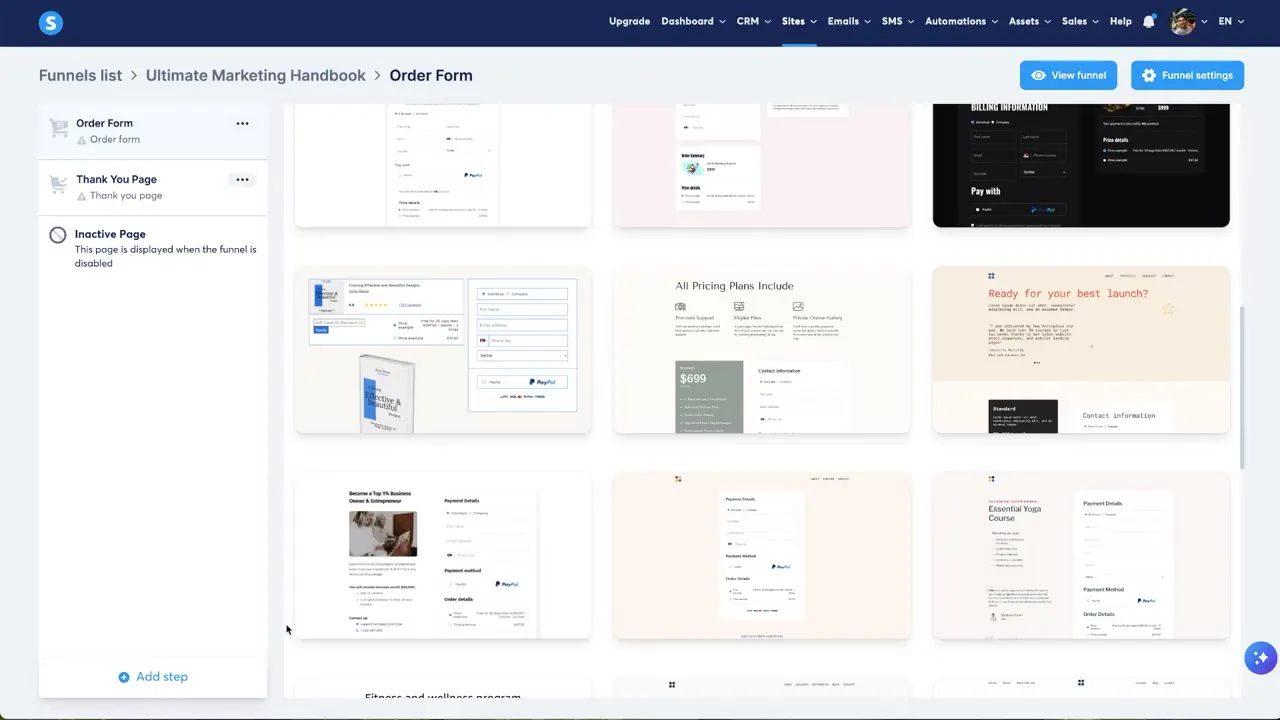
The template gives you both pages. Sandwiched between them is the order form, and that is where the money actually moves.
Step 3: How do you configure the order form so it can take payments?
Open the funnel and click the order form step.
Every Systeme.io funnel needs two pages minimum: an order form and a thank you page. The order form holds the checkout.
Set the page URL to order. If this funnel is the only thing on your domain, point the root domain at it instead. Same page, shorter link.
Now set the offer type to Digital. If you sold a physical product, this dropdown is where you would say so.
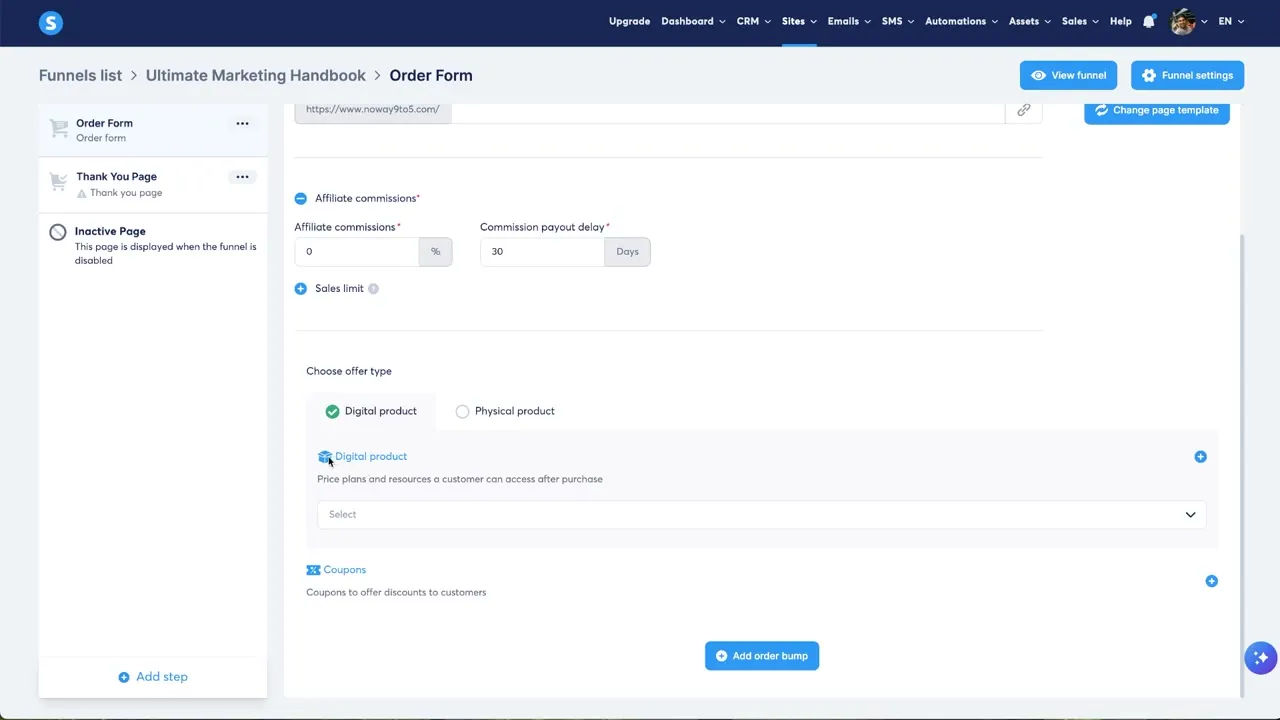
Here is where the build stops if you follow it in the wrong order. You cannot attach a digital resource yet, because the resource has to be a tag, a course, a course bundle, a community, or a calendar event, and none of those exist in this account.
So leave this screen open and go make the tag. It takes 30 seconds.
Step 4: Why create a product tag before you create the product?
Path: Sites, then Tags, then Create.
Name the tag exactly what you named your product. Every buyer who comes through the funnel gets labeled with it.
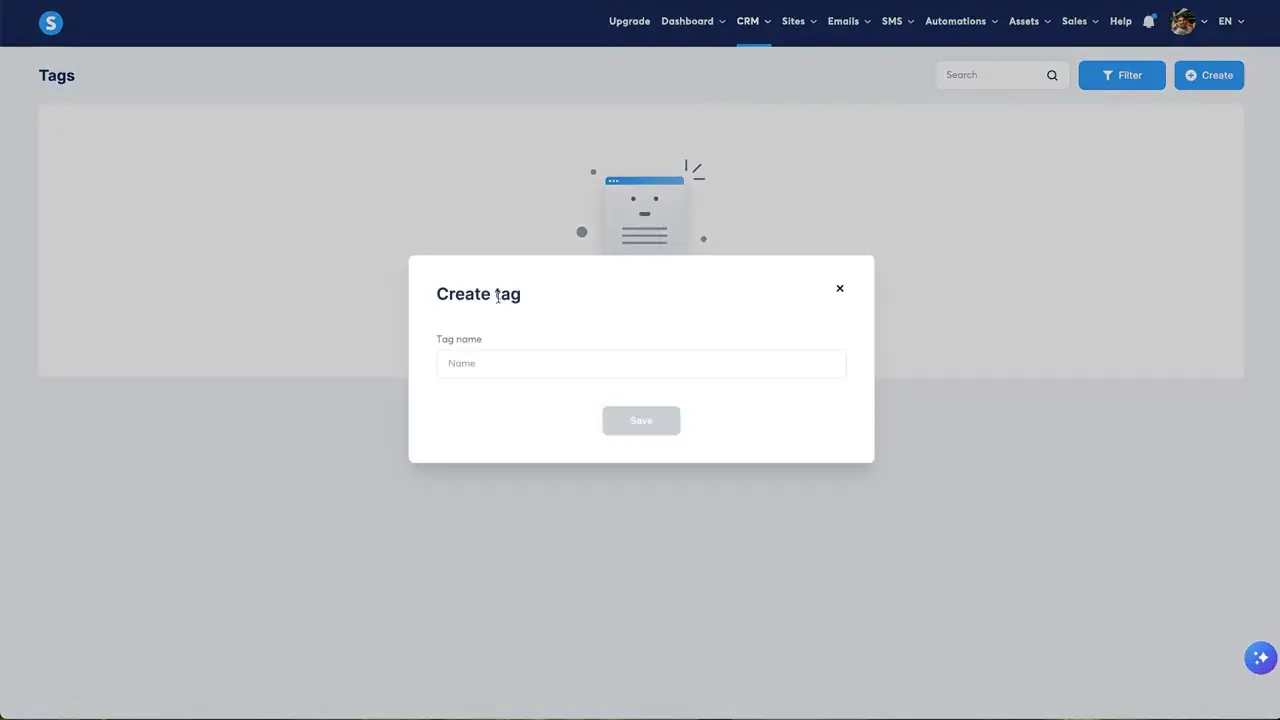
Tags do two jobs. They tell you who owns what, and they become the segment you email when you launch your next product. Buyers who already paid you are the easiest people to sell to again.
“Why can I not just create the tag from the product screen?” Because the platform does not allow it. You cannot create a resource mid-build, which is why this step sits before the product setup and not after it.
Tag exists. Go back to the order form, refresh the page, and the product setup opens up.
Step 5: How do you set up the digital product and pricing plan?
Back on the order form, click the plus to add a product and give it the product name.
Under Resource, click the plus again, choose Tag, and pick the tag you just made. If you sell a course instead of a download, the dropdown offers Course and Course bundle as well.
Now the pricing plan. You can attach several plans to one offer, which is how you set up a three-payment plan next to a full-price option.
For this build I use one-time payment at $17 and label it Ultimate Marketing Handbook, since that label shows on the checkout page.
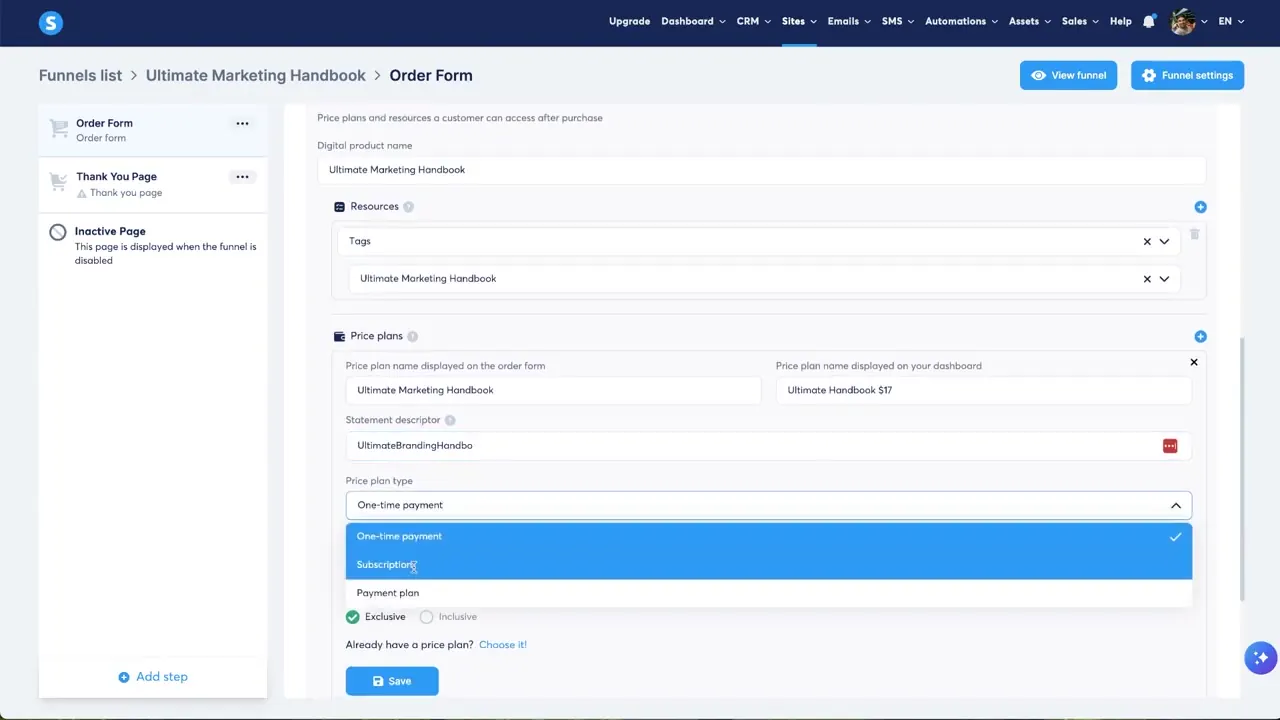
Set the statement descriptor to something your buyer will recognize on a bank statement. Your brand name or a short version of the product name both work. Fit as much of it as you can.
Then choose the pricing type: one-time, subscription, or payment plan. Choose whether the price includes tax or excludes it.
WARNING: you save twice here. Once inside the pricing plan form, and once on the offer itself. The second save is the one people miss, and skipping it throws away the plan.
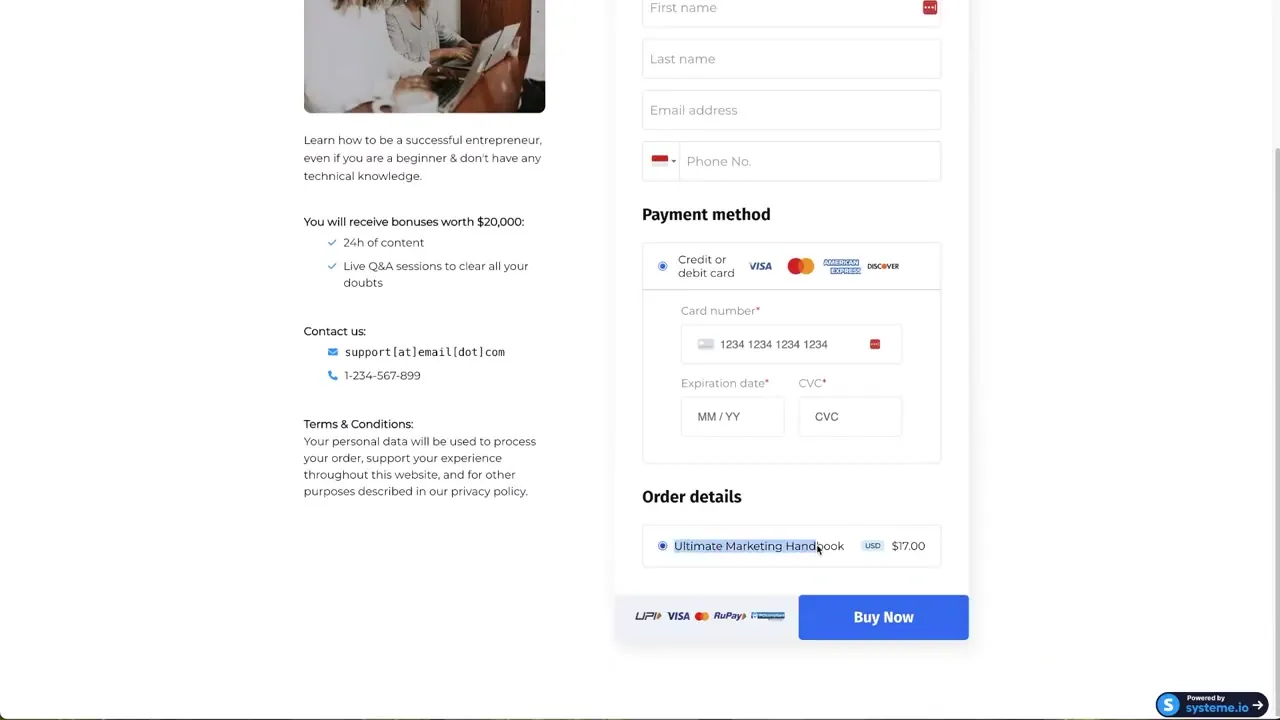
Payments work now. What does not work yet is delivery, and delivery is the part that makes this a business instead of a checkout page.
Step 6: How do you deliver the PDF automatically after payment?
Path: Automation rules, then Add rule.
Set the trigger to New sale. A trigger catches the event, and this event fires the moment a card clears.
Set the action to Send an email, then click Create email message.
Subject line – something like this: “Congratulations, your new handbook has arrived.” Straightforward beats clever when the buyer is checking their inbox for a file they paid for.
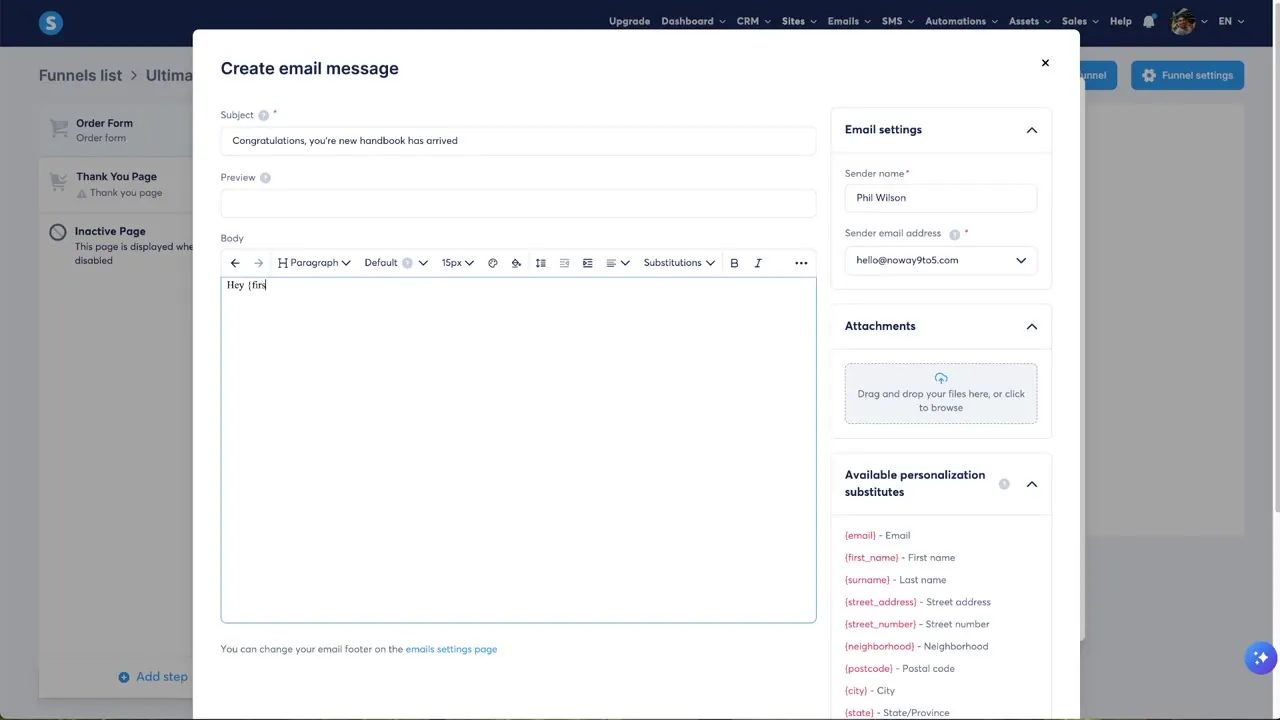
In the body, use the personalization substitutions on the right. Drop the first name token into the greeting and the email arrives addressed to the buyer rather than to nobody.
The body itself needs four things: what they bought, where the file is, what to do with it, and how to reach you. Three sentences. Buyers do not read long delivery emails, they look for the attachment.
Under Attachments, upload the actual file. The buyer gets it the second the payment clears.
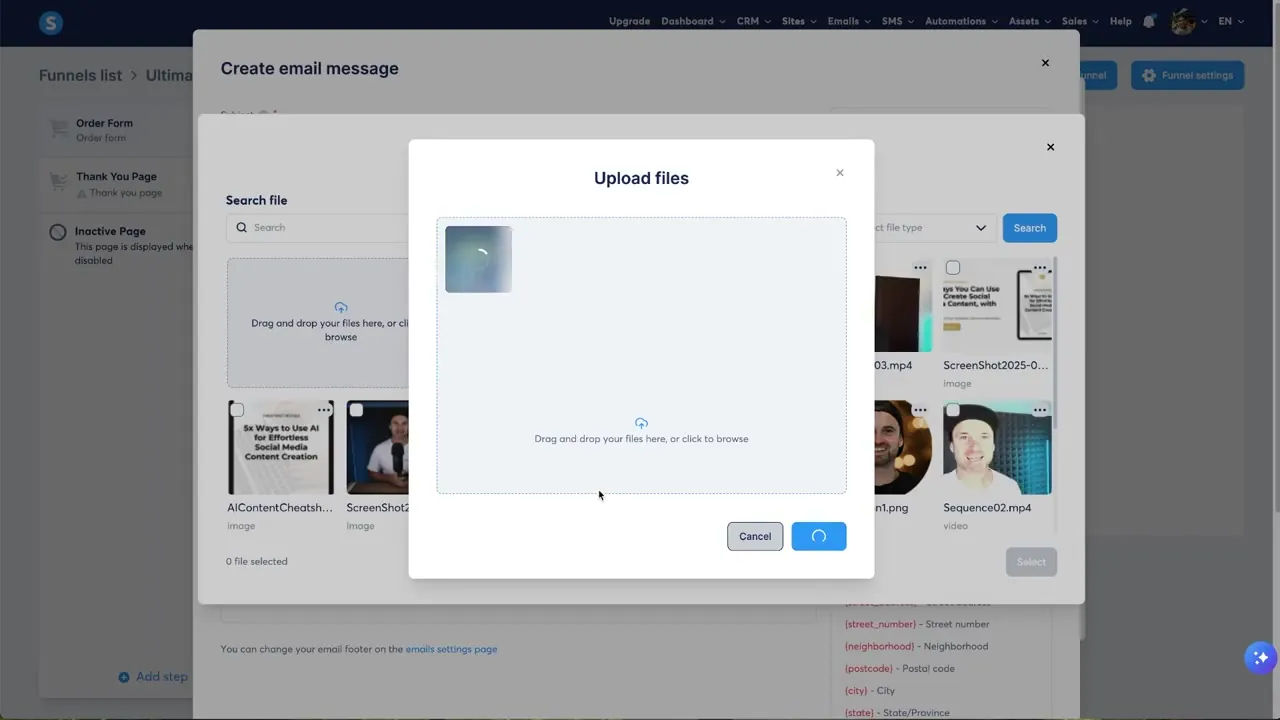
If your file is too big to attach, highlight link text in the body and point it at the file instead. The file storage that comes with every plan is where you host it.
Click Select, then save the rule. Confirm the rule shows as active.
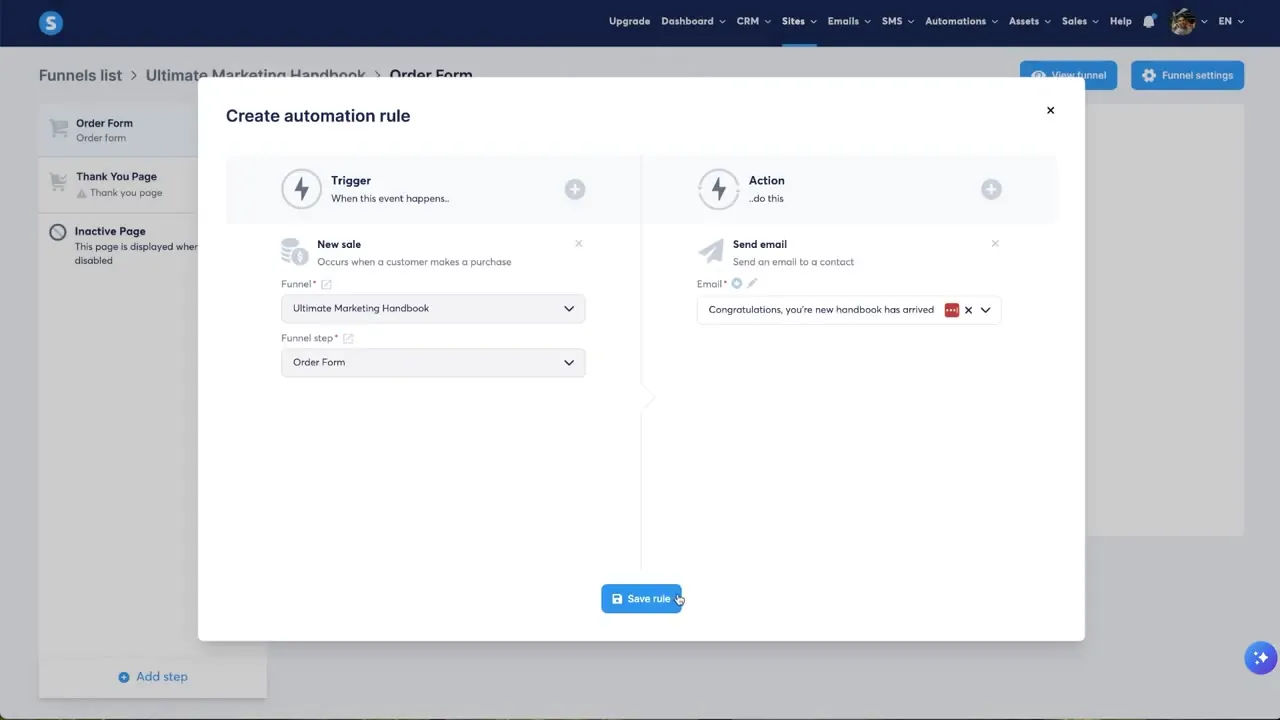
Read what you just built. A stranger pays you, gets tagged, and receives the file without you touching anything. The machine works end to end.
The rest of the build is making it look like something people trust.
Step 7: How do you edit the sales page so it converts?
Open the order form step and click Edit page. You land in the builder, and the page looks whatever way you make it look.
Copy, image, and layout
The top of the page needs one line that says what the buyer gets. I use: learn how to master digital marketing in 60 minutes.
Click the image block, then the small cloud icon, and replace the placeholder with your real product cover. You can resize it and drag it where you want it.
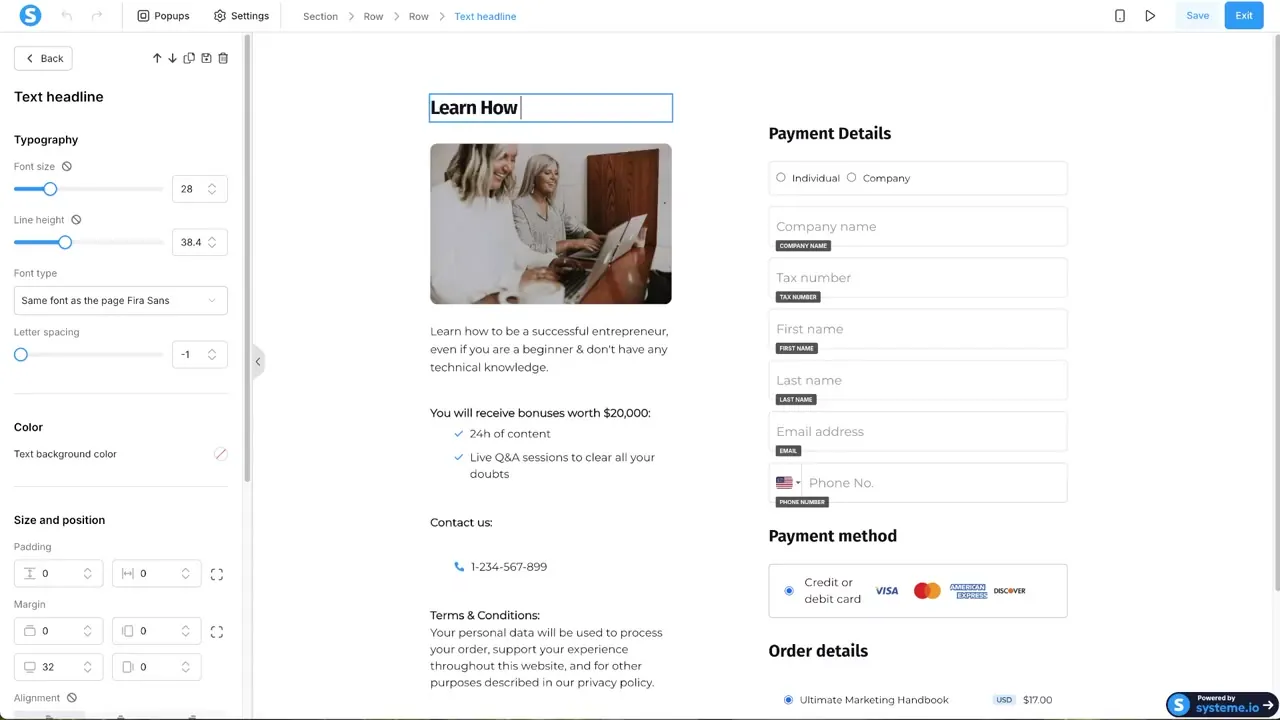
Add three or four bullets under the headline. One benefit each, no sentences.
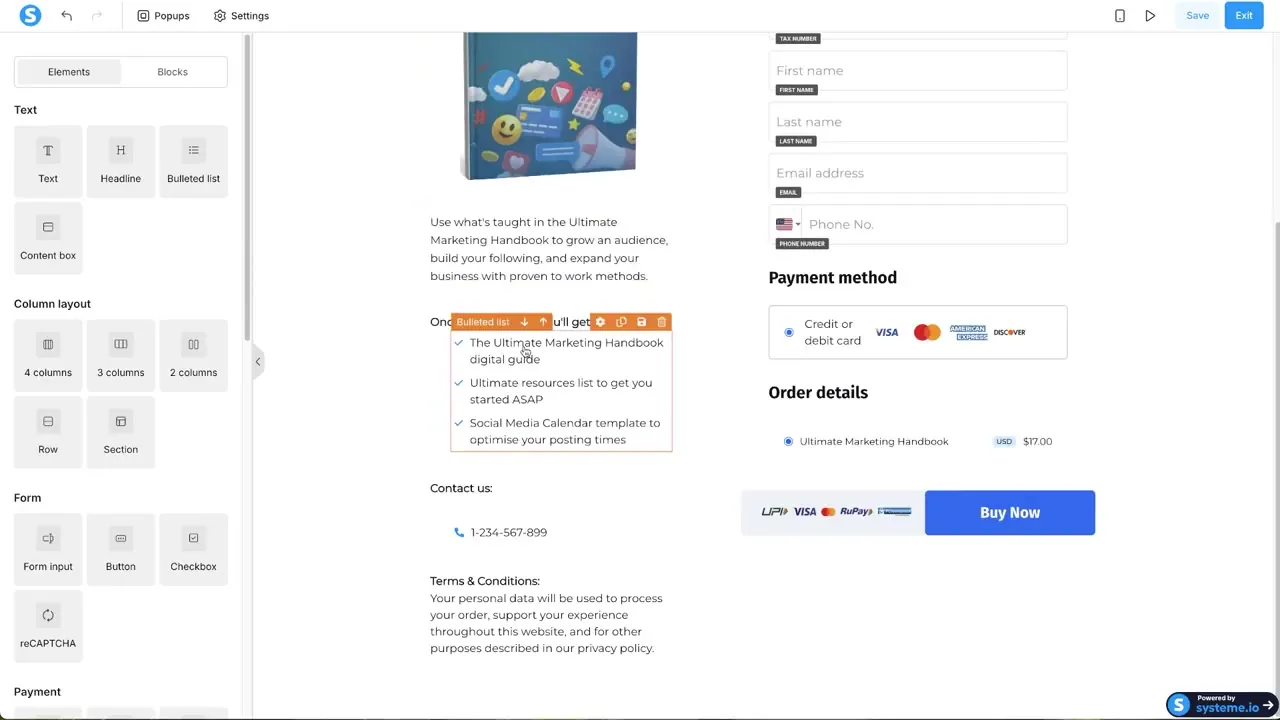
Delete the contact block and any filler list items the template shipped with. Empty rows do not sell anything.
Then fix the spacing. These numbers are the difference between a page that looks built and a page that looks assembled:
- The headline block margin is 32 by default. Set it to 12.
- The image block needs about 5 of margin around it for breathing room.
- The gap under the image is still wide. Set the bottom to 6.
Checkout fields
Now the right column, where the form fields live.
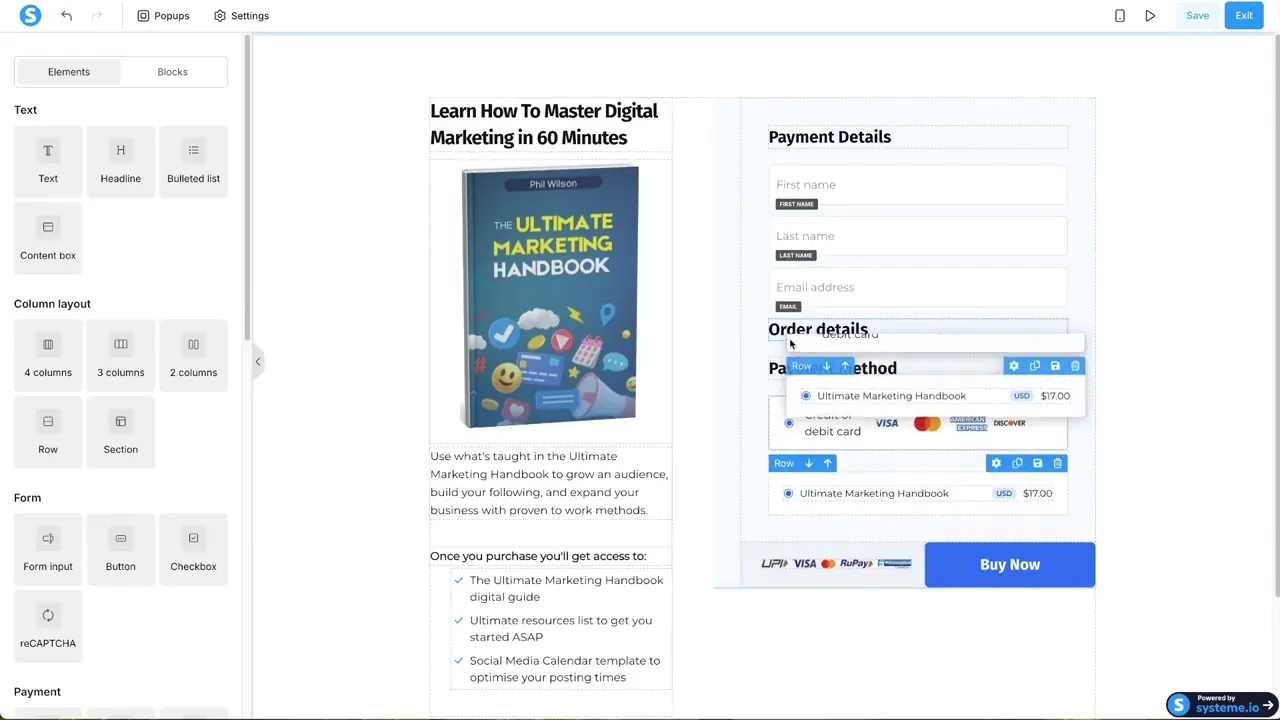
Delete company name. Delete the tax number field. Delete phone number. Delete the company or individual toggle. Keep first name, last name, and email.
More checkout fields = more abandoned carts. Every field you add is another chance for someone to close the tab, and you can collect the rest after they pay.
Drag first name to the top of the list.
Then fix the font mismatch. The field labels are set to 16 and the placeholder text is set to 18, so the placeholders look oversized next to the labels. Change the placeholders to 16 and the form looks deliberate.
One last change on desktop: drag the order details block above the payment method block. Buyers read what they are paying for first, then pay.
Desktop looks right. Scroll back to the top and flip the mobile toggle before you save, because that is the view most of your buyers will land on.
Step 8: Does the Systeme.io checkout work on mobile?
Yes, and it needs one fix before it looks right.
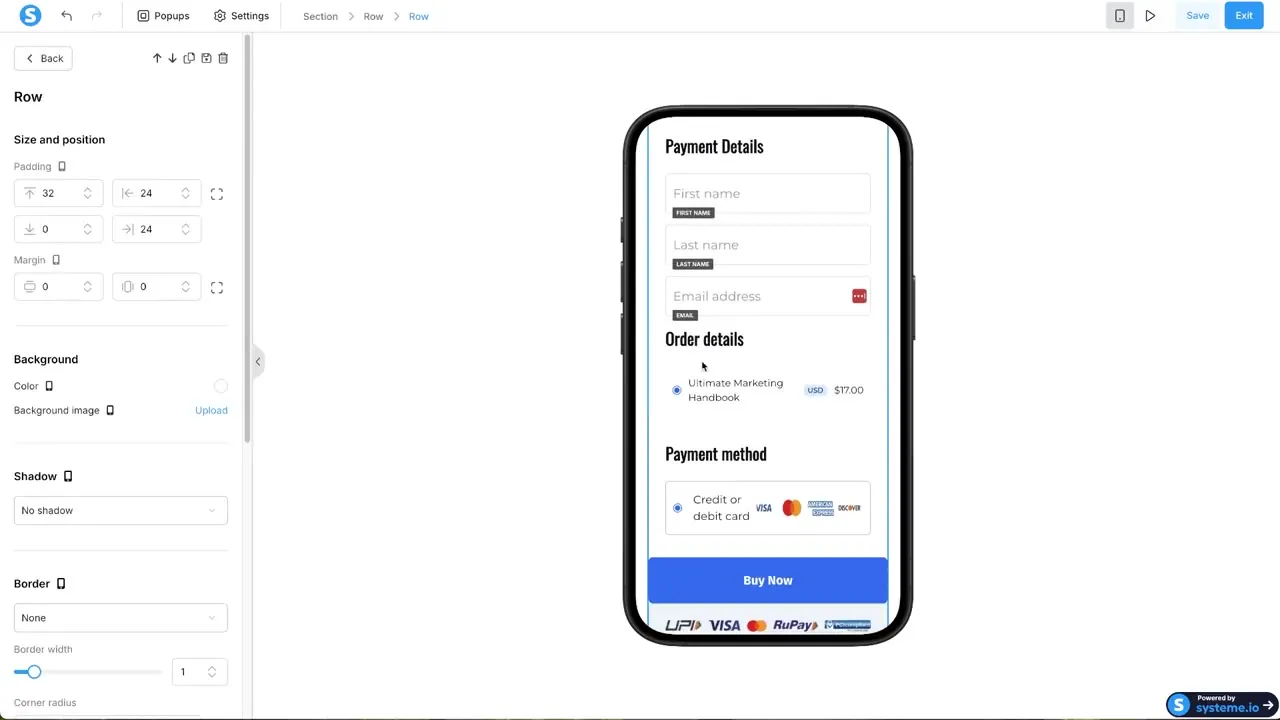
- Click the mobile view button at the top of the builder. You will see a strip of empty space on the left and right of the form.
- Select the container, find the side padding, and set it to zero. The form then runs the full width of the screen.
- Add a little top padding so the first field does not touch the browser bar. Then set the row to 20 by 20 padding.
Save and exit. Half the funnel is done, and the second half is shorter.
Step 9: How do you build the thank-you page?
Create the page the same way you created the order form, pick a template, and set the URL path to success.
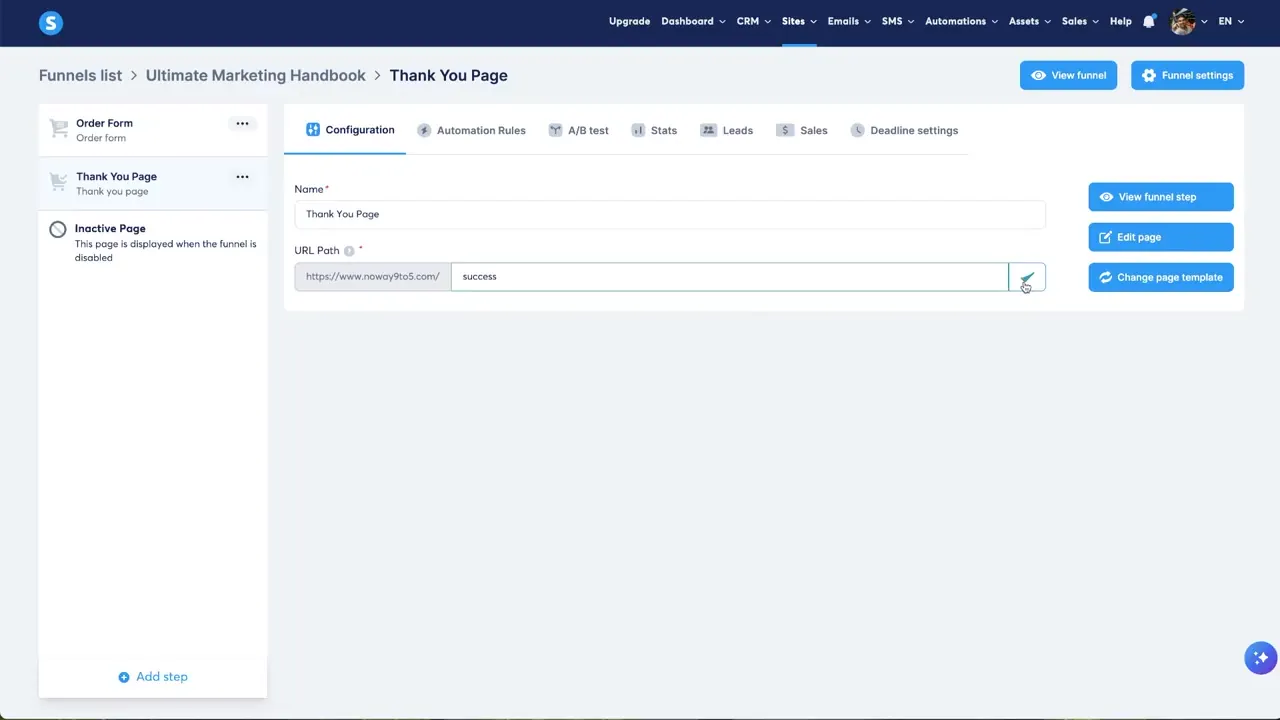
Click away from the field and you get a green check confirming the path is live. If you see red instead, the path is already in use elsewhere in the account.
This page has one job: get the buyer to open their email. Everything else comes off it.
Delete the hero rows, the contact block, the footer, and any extra sections. Keep it close to empty.
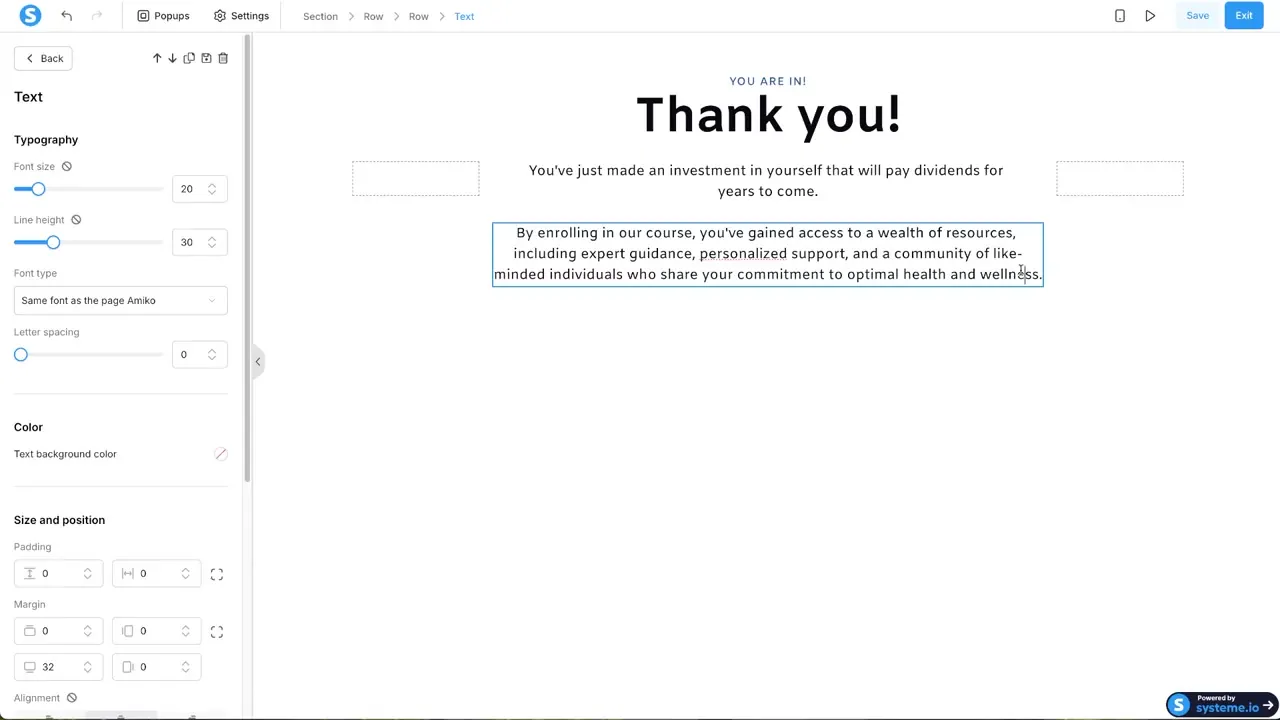
Then write three short lines. Thank them. Tell them the ebook is in their inbox. Give them your email address for questions.
Add the product cover again at a smaller size, so the page visually confirms what they bought. Check the mobile view, save, and exit.
The funnel is built. Now prove it works before you send traffic at it.
Step 10: How do you test your funnel without losing money?
Systeme.io has no test mode. To test the funnel you have to buy your own product.
“Is there really no sandbox?” No, and this is the part I wish they simplified. Two ways around it, and one is faster.
- Option one: buy it at full price. Then open Contacts, find your own record, scroll to payments, click the three dots next to the charge, and refund.
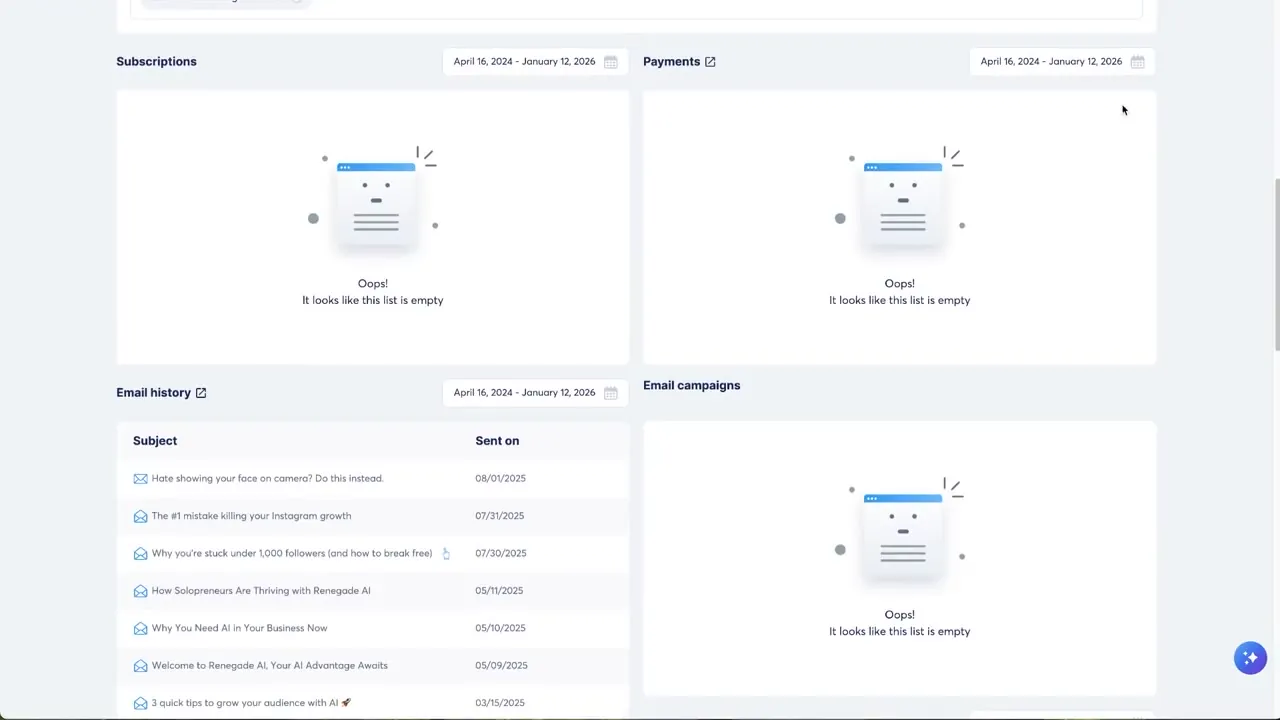
Your money comes back and you have tested the real thing.
- Option two: swap the price. Edit the offer, detach the $17 plan, click the plus, and create a temporary plan called $1 test with its own statement descriptor. Buy that, then swap the real plan back in.
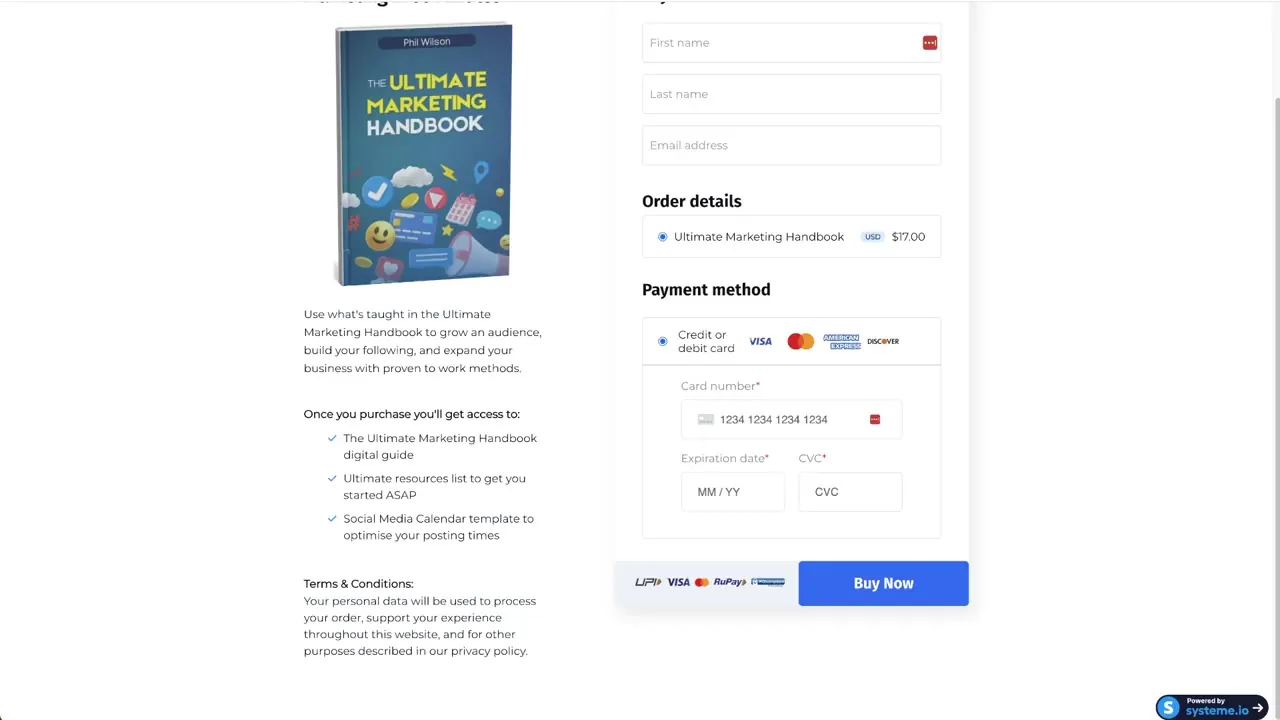
One snag you will hit: the price change does not appear until you save a second time and confirm. Reload the page after saving.
What a passing test looks like:
- The order goes through and the card clears
- The thank-you page loads at your
successpath - The delivery email arrives with the file attached
- The contact record shows your product tag
- The payment appears in your dashboard
If all five happen, the funnel works. Not one of them is optional, and the attachment is the one that fails silently if you forgot it.
Once the test passes, one last decision sits in front of you: is Systeme.io the right home for this funnel?
Is Systeme.io better than Stan Store and other link-in-bio storefronts?
They solve different problems.
Stan Store and similar link-in-bio apps give you a clean checkout and a page to point your audience at. Fast to set up, and if all you need is a payment link, that is enough.
Systeme.io is marketing software with a storefront attached. The same account holds your email campaigns, a lightweight CRM, tags, automations, upsells, and downsells.
| Systeme.io | Link-in-bio storefronts | |
|---|---|---|
| Checkout | Yes, on free | Yes |
| Email campaigns | Yes, 1 on free | Rare or none |
| Automations | Yes, 1 rule on free | No |
| Upsells and downsells | Yes | No |
| Learning curve | Steeper | Flatter |
Where Systeme.io loses: the builder is clunkier, and your first funnel takes real concentration. If you only ever sell one $9 template, the extra machinery sits unused.
If you want email and automation living in the same place as your checkout, Systeme.io wins on the free plan alone.
Start on the free plan and see the builder yourself before you commit to anything.
Frequently asked questions
Short answers to the things people ask me most about selling digital products on Systeme.io.
Can I sell digital products on the Systeme.io free plan?
Yes. The free plan covers 2,000 contacts, 3 sales funnels, 1 custom domain, 1 email campaign, and 1 automation rule, with unlimited email sends and no transaction fees. That is enough to build the whole funnel in this article, including automated delivery of your file.
How long does it take to build a Systeme.io funnel?
About one hour. The functional part, meaning the product, the pricing plan, and the delivery automation, takes roughly 20 minutes. The remaining 40 minutes go into page layout, deleting fields you do not need, and checking the mobile view before you save.
Can I use Stripe or PayPal with Systeme.io?
Yes, both. You connect your gateway once in your account settings, then choose which one to use on each offer. Systeme.io adds no transaction fee of its own, so you only pay whatever Stripe or PayPal charges you directly. There is nothing extra to reconcile.
How do I deliver a file that is too big to attach?
Use a link instead of an attachment. Upload the file to the file storage included with every Systeme.io plan, then highlight text in the delivery email body and link it to that file. Buyers click through and download it from the same email.
Do I need a custom domain, or can I use the free Systeme.io subdomain?
Yes, connect a domain. A custom domain is required for sending buyer emails from your own address. Without it you lose the automated delivery email, which is the part that saves you time on every order. The subdomain works for a free lead magnet.
How do I refund a test purchase in Systeme.io?
Open Contacts, find your own record, scroll to payments, click the three dots beside the charge, and choose refund. The payment is reversed in the dashboard. Run this every time you change the offer, so the buy path keeps working.
Does Systeme.io support upsells and order bumps?
Yes. Systeme.io includes one click upsells and order bumps, and you add them as extra steps inside the same funnel you already built. Check the funnel step limit on your plan before you build them, because the free plan caps the total.
Can I sell digital products on Systeme.io without a website?
Yes. The sales funnel page in this article is your product page, so you do not need a separate website. You still want a custom domain attached to it, because buyer emails and your checkout links are tied to that domain.
What to do next
Three moving parts, and you now have all three: a page that sells, a checkout that takes money, and an email that delivers the file.
If you sell digital products with Systeme.io once, you will use this exact build for every product after it. The tag, the pricing plan, and the automation change names. Nothing else does.
Run your test purchase today, while the screens are still fresh. Then link the funnel somewhere and watch the first order land.
Start building your funnel on Systeme.io
Questions about a step that behaved differently in your account? Leave a comment, and I will answer what I can.
👉 Aκολούθησέ με στο Facebook και ενεργοποίησε τις ειδοποιήσεις για να λαμβάνεις τα νέα άρθρα μου.